
Why Getting Your Quick Connect Outboard Fuel Line Right Matters
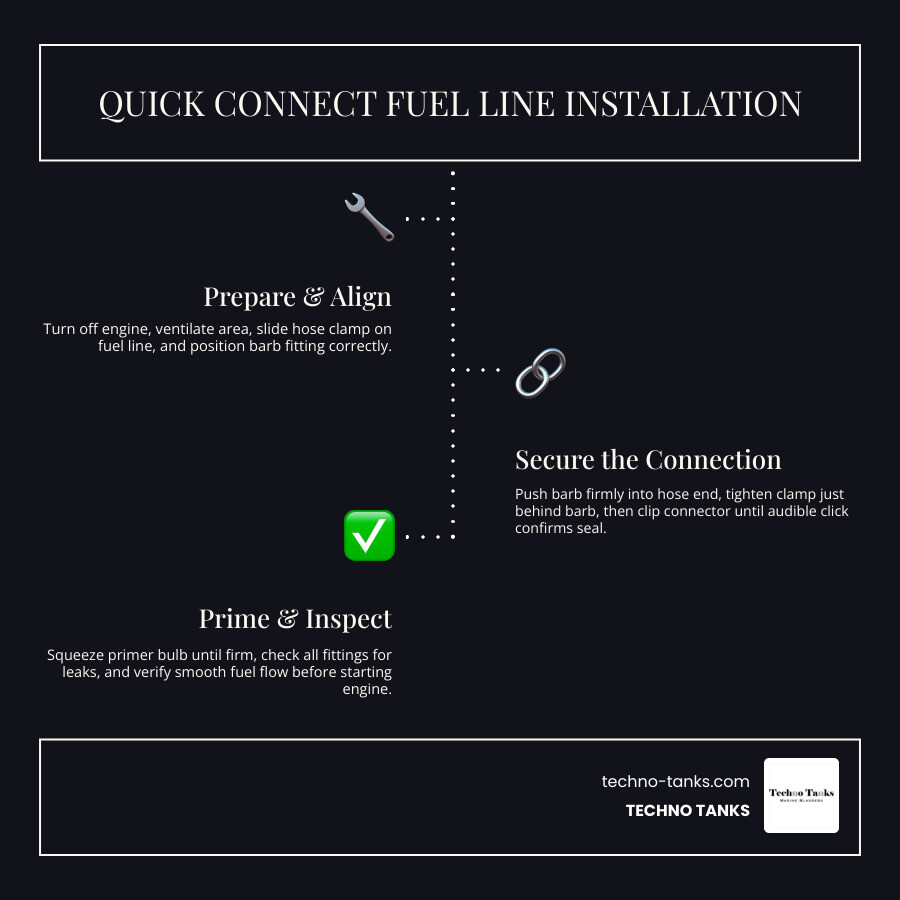
How to connect a quick connect outboard fuel line:
- Turn off the engine and make sure the area is well-ventilated
- Slide a hose clamp onto the fuel hose
- Push the barb fitting firmly into the hose end
- Tighten the clamp just behind the barb
- Clip the connector onto the matching fitting until you hear an audible click
- Squeeze the primer bulb until firm, then check for leaks before starting
A quick connect outboard fuel line fitting is one of those small parts that makes a huge difference — especially when you’re out on the water with extra fuel tanks and need a fast, leak-free connection to your engine.
For boat owners who carry portable fuel tanks on long fishing or cruising trips, a faulty or mismatched connector is more than an annoyance. It can mean engine sputtering at full throttle, a persistent smell of gasoline, or worse — a fuel leak far from shore.
The good news? Installing or replacing a quick connect fuel line connector is a straightforward job. You don’t need to be a marine mechanic to do it right. But you do need to know which connector fits your engine, what size hose you’re working with, and how to seat and test the fitting properly.
I’m Ivan Jimenez, founder of Digital Ivan, and I’ve spent years building content and authority systems for marine and industrial brands — including deep research into quick connect outboard fuel line systems for companies like Techno Tanks. That experience informs everything in this guide, so let’s get right into it.
Simple quick connect outboard fuel line word guide:
Understanding Your Quick Connect Outboard Fuel Line System
At its core, a quick connect outboard fuel line system is designed to provide a secure, airtight, and watertight bridge between your portable fuel tank and your outboard motor. Most modern systems utilize a two-part setup: a male adapter (usually fixed to the tank or the engine) and a female connector (attached to the ends of the fuel hose).

The primary benefit of this design is the “quick” part—allowing you to swap tanks or remove the fuel line for storage without needing tools or dealing with messy spills. High-quality connectors, such as those used with Techno Tanks systems, often feature a double-seal design. This means there are internal valves or O-rings that snap shut the moment the connection is broken, preventing fuel from leaking out and, perhaps more importantly, preventing air from being sucked into the line.
The “clip-on” style is the most common mechanism you’ll encounter. It involves a spring-loaded latch that locks onto a groove on the male fitting. When you push the female connector onto the tank or engine post, you should hear a distinct click. This click is your first sign of a job well done.
Choosing the Right Quick Connect Outboard Fuel Line Size
One of the most common mistakes boaters make is assuming all fuel lines are the same size. In reality, the internal diameter (ID) of your fuel hose and the barb size of your connector must match perfectly to prevent leaks or fuel starvation.
As of May 2026, the industry standard relies on three main barb sizes:
- 1/4-inch barb: Often found on smaller outboards (typically under 25-40 HP).
- 5/16-inch barb: A very common mid-range size used for many 40 HP to 90 HP engines.
- 3/8-inch barb: The standard for high-horsepower engines (115 HP and up) that require a higher volume of fuel flow.
| Engine Horsepower | Recommended Hose ID | Fitting Barb Size |
|---|---|---|
| 2 HP – 30 HP | 1/4″ (6mm) | 1/4″ |
| 40 HP – 90 HP | 5/16″ (8mm) | 5/16″ |
| 115 HP – 300+ HP | 3/8″ (9.5mm) | 3/8″ |
Using a connector with an orifice that is too small can lead to flow restrictions. For example, a high-performance engine might require 9/32″ ID fittings to maintain proper fuel pressure. If you use a restricted connector, you might experience “bogging” or sputtering when you try to reach wide-open throttle (WOT).
Compatibility Across Major Outboard Brands
Unfortunately, there is no single “universal” connector that fits every engine brand perfectly. Each manufacturer has developed its own proprietary shape for the male and female ends. If you are looking for a Fuel Line Quick Connector, you must match it to your engine’s brand:
- Mercury/Mariner/Force: Usually uses a clip-on style. Specific models like the 13563Q7 are designed for the 4-40 HP range, while the 13563Q3 is a staple for larger Force and Mercury engines.
- Yamaha: Known for a robust two-prong style connector. Many aftermarket brands like Five Oceans offer compatible 3/8″ barb connectors that can bridge the gap between Yamaha and certain Mercury tanks.
- Johnson/Evinrude (OMC): These use a distinct two-pin side-by-side design. While popular, some users on the E-TEC Owners Group have noted that older J/E connectors sometimes have smaller internal orifices than Yamaha equivalents, which can be a factor for high-flow needs.
- Suzuki/Honda: These often share similar designs. A high-quality Honda/Suzuki 3/8″ female connector is a common replacement part for those looking to upgrade from leaky stock fittings.
Always check your OEM (Original Equipment Manufacturer) specifications before buying. While aftermarket parts are often built to ISO 9002 standards and perform excellently, verifying the part number cross-reference is essential for a leak-free fit.
Step-by-Step Installation and Removal Guide
Installing a quick connect outboard fuel line is a task we believe every boater should master. It’s the first line of defense against being stranded.

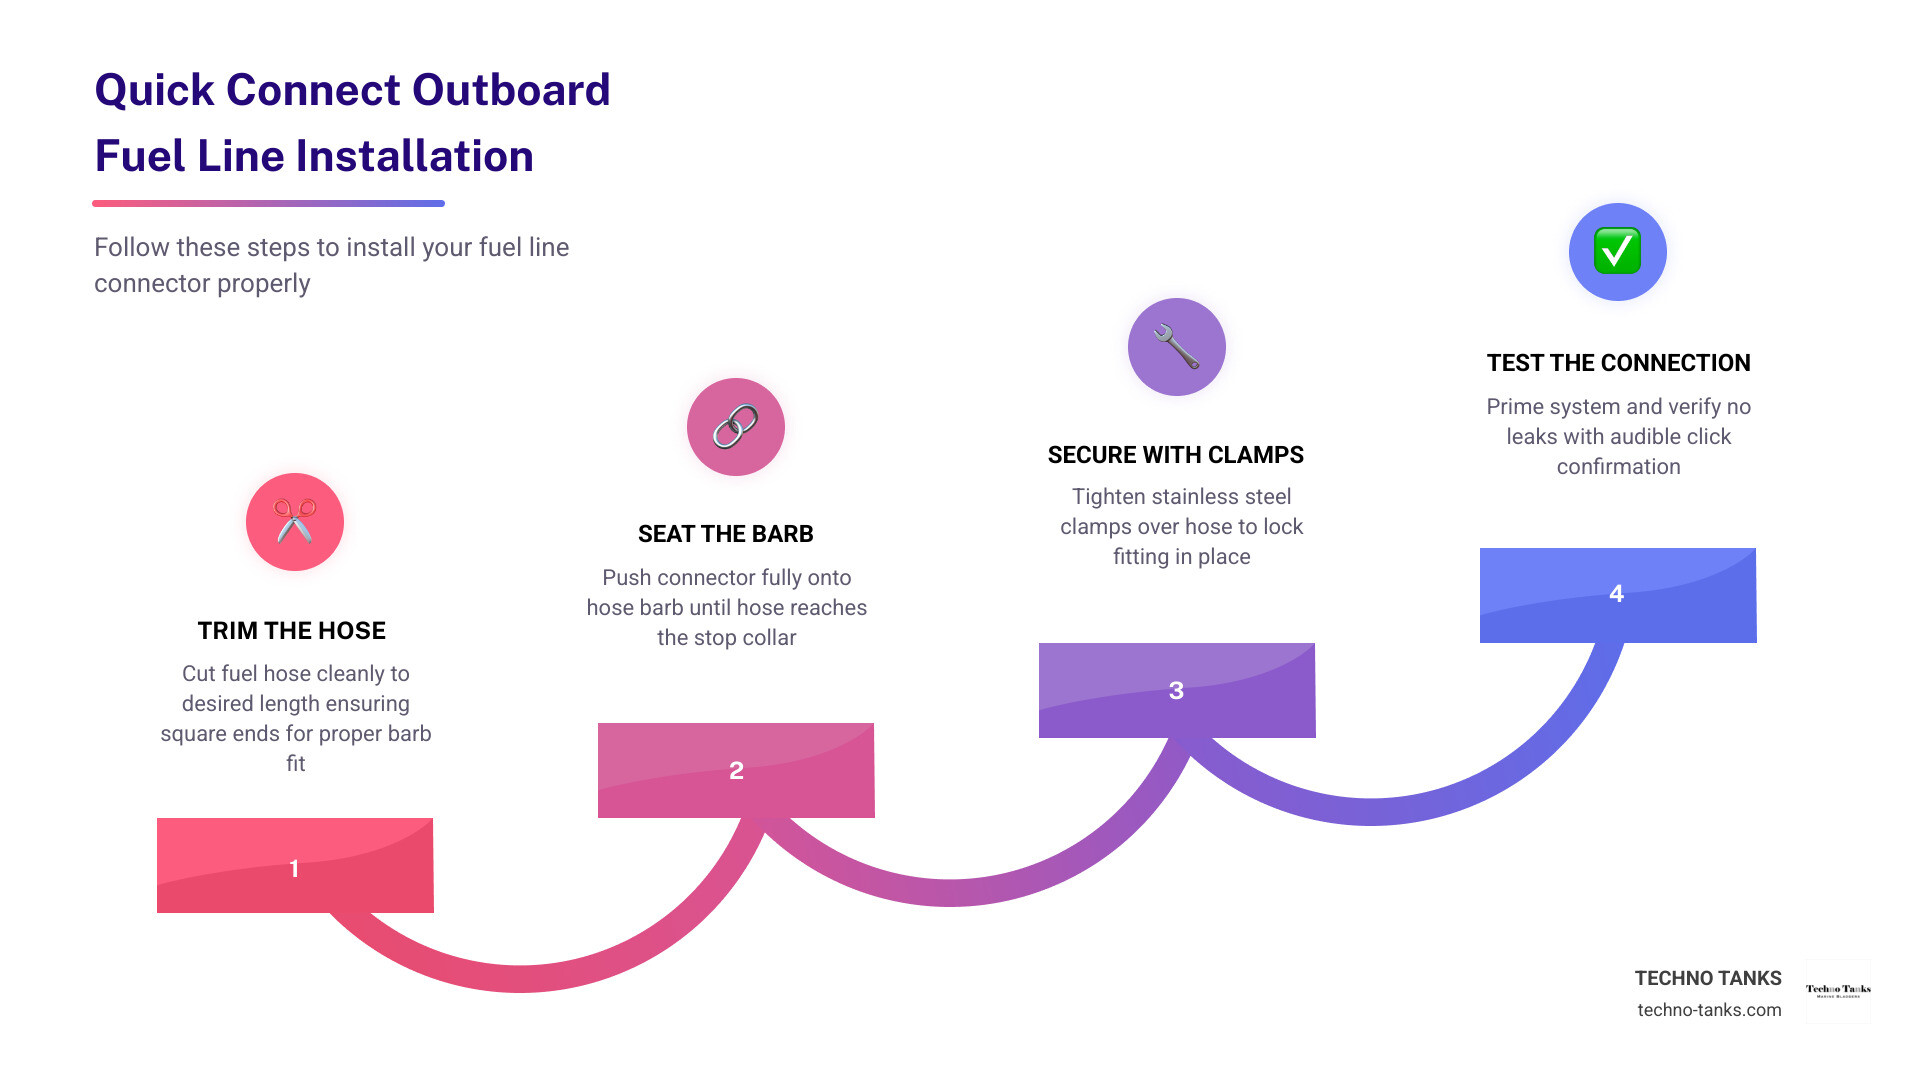
Step 1: Preparation and Safety Ensure your engine is off and cool. Work in a well-ventilated area—gasoline vapors are heavier than air and can settle in the bilge or the bottom of a boat, creating a fire hazard.
Step 2: Trim the Hose If you are replacing an old connector, don’t just pull it off. Cut the last inch of the fuel hose off using a sharp utility knife. This ensures you are attaching the new connector to fresh, un-stretched rubber, which provides a much better seal.
Step 3: Sliding the Clamp Slide a stainless steel hose clamp onto the hose before you insert the connector. It sounds obvious, but we’ve all forgotten it once!
Step 4: Seating the Barb Push the barb end of the quick connect outboard fuel line fitting into the hose. It should be a tight fit. If you find it difficult, you can dip the end of the hose in warm water to soften the rubber slightly. Ensure the hose is pushed all the way up to the shoulder of the connector.
Step 5: Securing the Connection Position the clamp just behind the barb’s ridges and tighten it securely. If you are extending a line, you might use a Fuel Line Extension Connector to join two lengths of hose.
Securing the Quick Connect Outboard Fuel Line Fitting
Once the connector is attached to the hose, it’s time to mate it with the tank or engine.
- The Audible Click: When you push the female connector onto the male post, listen for a click. Give it a firm tug to ensure it doesn’t pop back off.
- Priming: Use your primer bulb to pump fuel through the system. Ensure the arrow on the primer bulb is pointing toward the engine. Keep Outboard Motor Maintenance Tips from the Pros in mind: pump until the bulb feels firm.
- The Leak Test: With the system pressurized by the primer bulb, run your fingers (carefully) around the connection points. You are looking for any sign of “weeping” fuel. If you see fuel or smell a strong scent of gas, the seal is not secure.
Safety, Materials, and Performance Standards
When shopping for a quick connect outboard fuel line, material choice is everything. The marine environment is brutal, combining salt, UV rays, and the corrosive nature of modern fuels.
Most high-quality connectors are made from Acetal resin or ABS plastic. Acetal is particularly valued for its high-impact resistance and durability. It won’t become brittle as quickly when exposed to direct sunlight. Furthermore, in 2026, it is vital to ensure your connectors and hoses are compatible with ethanol-blended fuels (like E10 or even E85). Ethanol can eat through older rubber and plastic compounds, leading to internal degradation that clogs your carburetors or fuel injectors.
Look for fittings that mention “double-sealed” construction. This provides an extra layer of protection against air intrusion—a common culprit for engine performance issues. We recommend checking for ISO 9002 certification, which indicates the part was manufactured in a facility with strict quality control batch inspections.
Troubleshooting Your Quick Connect Outboard Fuel Line
If your engine is sputtering or losing power at high speeds, the quick connect outboard fuel line is often the first place to look.
- Air Intrusion: If the O-ring inside the female connector is nicked or worn, the fuel pump might suck air into the line instead of fuel. This causes the engine to lean out and sputter.
- Fuel Spray: A visible spray when you prime the bulb means the connector isn’t fully seated or the internal seal has failed.
- Vacuum Testing: For larger engines (115 HP+), technicians often perform a vacuum test. According to industry experts, the maximum fuel vacuum should generally stay under 4″ Hg. If your vacuum reading is higher, it means there is a restriction in the line—often a connector with an orifice that’s too small.
- O-Ring Degradation: Periodically inspect the male posts on your tank and engine. If the O-rings are cracked or missing, the “quick connect” won’t be airtight.
Frequently Asked Questions about Outboard Connectors
How often should I replace my fuel line connectors?
We recommend a thorough annual inspection. Check for brittleness, visible cracks in the plastic, or any signs of corrosion on the metal clips. In the marine world of 2026, preventative maintenance is much cheaper than a tow. If the connector feels “loose” or doesn’t click sharply into place, replace it immediately. Generally, replacing the entire fuel line assembly (hose, bulb, and connectors) every 2–3 years is a best practice for frequent boaters.
Can I use a quick connect with high-horsepower engines?
Yes, but you must be careful about sizing. Portable fuel tanks are generally not recommended for outboards larger than 115 HP because the standard quick-connect fittings can limit fuel flow. If you are running a high-horsepower engine, ensure you are using a 3/8-inch ID hose and fittings with the largest possible internal orifice (typically 9/32″ or larger). Always monitor your engine’s performance; if it starves for fuel at high RPMs, you may need to switch to a direct threaded connection.
What is the difference between tank-end and engine-end connectors?
While they may look similar, they often have different locking mechanisms.
- Tank-End: Usually a female connector that clips onto the portable tank’s pickup.
- Engine-End: A female connector that clips onto the engine’s fuel inlet. Some brands, like Mercury, use the same clip-on style for both, but others may vary. Kits like the Quicksilver 804787Q often include both ends to ensure a complete, compatible system. Always check the flow direction arrow on your primer bulb to ensure you are installing the right end in the right place.
Conclusion
Mastering your quick connect outboard fuel line setup is about more than just convenience—it’s about reliability and safety. By choosing the right barb size, matching the connector to your engine brand, and performing regular inspections, you ensure that your time on the water is spent fishing or cruising, not troubleshooting.
At Techno Tanks, we specialize in helping boaters go further. Our flexible marine fuel bladders are made from patented, recyclable thermoplastic polyurethane and are available in sizes from 30 to 3,000 gallons. Whether you are using a standard portable tank or one of our range-extending bladders, having the right Fuel Line Quick Connector is the key to a seamless experience.
Don’t Get Stranded with These Top Portable Boat Fuel Tanks and make sure your fuel system is ready for your next adventure. Safe boating!

